This article will cover the following:
- Offer card > Home
- Offer card > Creatives
- Offer card > Campaigns
- Offer card > Traffic
- Offer card > Landing Pages
- Offer card > Events
- Offer card > Contracts
- Offer card > Ecommerce
- Offer card > Affiliate
- Offer card > Advanced
- Offer card > Documents
- Offer card > History
Offer card > Home

The Home tab on the Offer card houses several mini tabs (Info, Caps, Redirect, Attribution, Tags & Grouped Offers tabs) as well as various buttons (Pixel, Test & Generate 1:Many Link). The Offer Card > Home subtabs document outlines all of the aforementioned tabs and buttons on the Home tab in much greater depth.
Offer card > Creatives

Creatives are the advertising assets that a network provides to affiliates for the purpose of generating traffic to their offer. The Creative tab is going to display all creatives that have been uploaded for this offer.
CAKE supports 4 different types of creatives:
Link: Simply a link that can be provided to an affiliate that will redirect to the offer link.
Email: Intended to be used in an email and can be either an HTM, HTML or TXT file. CAKE will dynamically find HREF links in the content of the file for the purpose of replacing them with one of two tokens; #url# or #unsub#.- #url#: This token will replace the offer link in the creative with the affiliate’s unique link.- #unsub#: This token will replace the unsubscribe link with the provided unsubscribe link in the offer.
Please see the Creatives: Email document for a comprehensive overview of this creative type.
Image: CAKE will support any image file type such as a .png, .jpg, .gif etc.
Flash: Shockwave Files (.swf) should be uploaded for this creative type.
Adding Creatives
There are two different import methods of creatives:
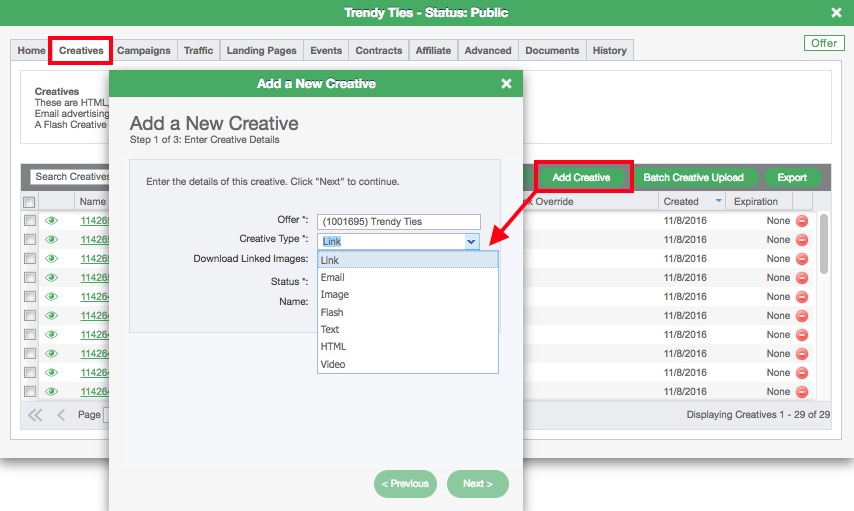
Add Creative: The Add Creative button is located in the Creative tab of the Offer card and allows for the upload of individual creatives. This import tool supports any of the creative types.
Batch Creative Upload: The Batch Creative Upload button is also located in the Creative tab of the Offer card and allows for multiple image or flash creative types to be uploaded at one time.
Click the Add Creative button and complete the Add a New Creative wizard (pictured above).
- Offer: Offer will auto-populate since we are adding creatives from the Offer card
- Creative Type: Select the type of creative you are wanting to upload
- Status: Only a status of Active will appropriately redirect to the offer link
- Name: Give the creative a relevant name
Once complete click Next and Finish and the new creative card will populate. For a separate document
Offer card > Campaigns
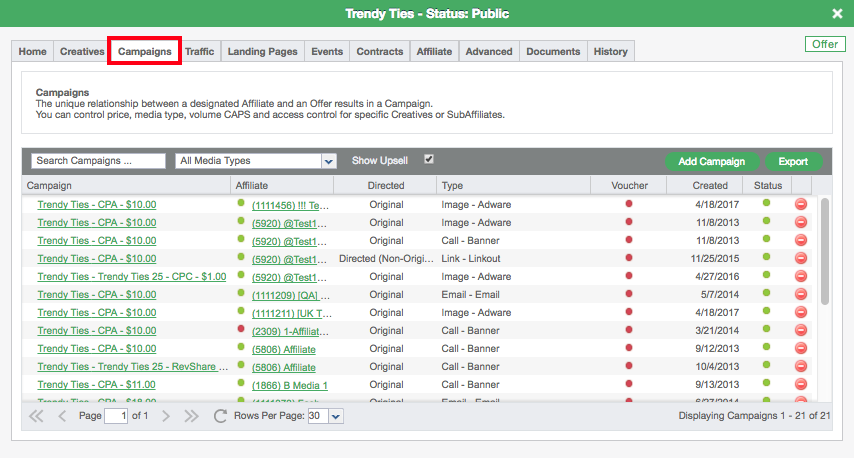
A campaign is the 1 to 1 relationship between an offer and an affiliate. The Campaigns tab in the Offer card shows a list of all of the affiliates that have campaigns for that offer.
The Campaign list includes Active, Inactive and Pending Campaigns
Both the Campaign and the Affiliate are accessible from this list by clicking on the hyperlinked name of either.
You can also add a campaign from this tab by clicking on the Add Campaign button and proceeding through the wizard.
Please see the How to Add a Campaign document for more information on this subject.
Offer card > Traffic

The Traffic tab controls all allowed and non-allowed traffic per offer.
There are 3 subtabs on the Traffic tab:
Targeting
Media Types
Blacklists
Traffic > Targeting

When an offer is first created there is no targeting enabled so the Targeting tab will have 'None' displayed as the targeting method meaning that all traffic is allowed. You have 2 options when it comes to restricting traffic to the offer.
- Geo Targeting
- Rules
Geo
Geo Targeting allows you to select a country or multiple countries as allowed, redirecting all traffic from outside those countries. This targeting method accounts for a country-level setting only so if you have additional targeting requirements or need to go a level deeper and target by region or state, you should use RULES instead of GEO.
- Users clicking on a CAKE unique link from an IP Address of an allowed country will redirect to the landing page as intended.
- Users clicking on a CAKE unique link from an IP Address of a disallowed country will redirect to a specified GeoTargeting redirect offer if one has been added. Otherwise the user will be redirected through the redirect strategy listed a little further down.
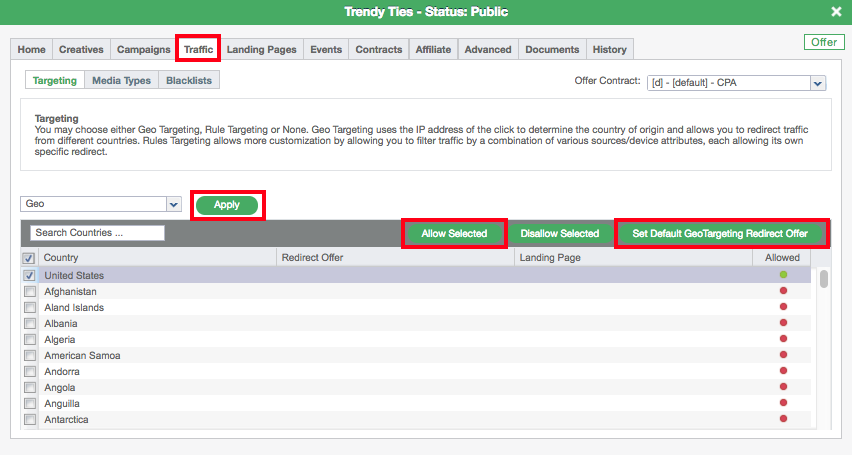
To apply Geo Targeting
- First change the filter to 'Geo' and click Apply
- Click 'Click to Change' and find the countries that you want to allow
- Select the countries that you want to allow (you can multi-select)
- Click 'Allow Selected'
At this point, the allowed countries will have a green dot in the 'Allowed' column and you can sort by this column as well to bring all of your allowed countries to the top. If you need to edit an existing Geo Targeting setting, you can click 'Disallow Selected'.
You can apply a designated redirect offer for disallowed countries by clicking on 'Set Default GeoTargeting Redirect Offer'.
Rules

For any targeting more advanced than country-level targeting you will want to use RULES instead. This allows for targeting by these criteria and allows for a region or state-level geotargeting instead of at the country-level which is what Geo allows you to do.
To add rules:
- Select 'Rules' from the drop-down and click Apply
- You can either apply an existing rule that's been created by being set as 'Shared' or you can add a new rule by clicking 'New Rule'
For more information on RULES, see this article.
Traffic > Media Types

An offer can be associated to all or specific Media Types. This is not a targeting feature in that CAKE doesn't redirect any traffic based on what's specified here, but allowing specific Media Types can be used as a tool to inform affiliates of media type restrictions (i.e. banner only).
By default, all Media Types are allowed for an offer. To change, click 'Click to change' > select your allowed media types > click 'Allow Selected'.
This will be reflected as green dots in the 'Allowed' column.
Traffic > Blacklists

Blacklists on the Offer card allows a user to redirect an affiliate or sub affiliate’s traffic to 1 of 3 Redirects.
To add a new Offer Blacklist from the Offer card > click on the Traffic tab > then the Blacklists sub navigation tab. > click the Add button
Affiliate: From this drop down select the affiliate you are wanting to blacklist
Sub Affiliate: This field is optional and will reference sub affiliates directly related to the affiliate chosen.
Reason: From the Reason drop down you are selecting the reason for which you are blacklisting an affiliate (these reasons can be created in Setup > Reason Lists subtab)
Type: From this drop down you are selecting where you are redirecting the blacklisted traffic to:
- 404: Selecting 404 will redirect traffic to a 404 page as opposed to the Offer or Global Redirect.
- Global Redirect: Selecting Global Redirect will redirect traffic to the Global Redirect set up in Tracking Settings.
- Offer Redirect: Selecting Offer Redirect will redirect traffic to the Redirect specified on the Offer.
Blacklist Date: This is where you are able to set the date when the Blacklist will take effect.
Once done click 'Update' to add the blacklist.
Offer Card > Landing Pages

Offer card > Events

Events are actions that occur before or after an initial conversion or application install. Events are created and live at the Advertiser level and can be activated or deactivated at the Offer level per each offer that utilizes them.
On the Offer card > Events tab is where you are able to see all events that have been created and allowed for this offer.
For a complete overview of the setup of Events please see the Events document.
Offer card > Contracts

Offer Contracts are a variation of the original offer that uses the same conversion pixel.
On the Offer card > Contracts tab you are able to build Offer Contracts and edit existing ones.
For a complete overview on the setup of Offer Contracts please see the Offer Contracts document.
Offer card > Ecommerce

The Ecommerce tab on the Offer card allows you to add Related Products as well specific Ecommerce Payout Rules. This tab is only prevalent if you are a client who is licensing the Ecommerce side of the CAKE platform. For a complete overview of Ecommerce and the Ecommerce tab on the Offer card please see the Ecommerce: Admin Setup and Configuration Guide.
Offer Card > Affiliate
The Affiliate tab on the Offer Card contains information regarding Email components necessary for your affiliates to run email campaigns and also information about the offer that is displayed to the affiliate in their Affiliate Portal.
Affiliate > Email
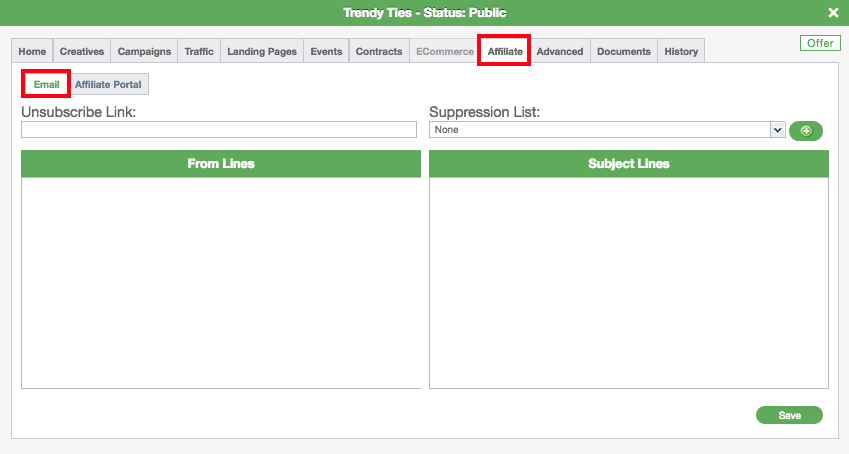
The Email tab contains information for email campaigns.
Unsubscribe Link: This is where the user inputs the unsubscribe link.
Suppression List: If suppression lists have been uploaded on the Advertiser card, the user will be able to select the list from the drop down.
From Lines: In this field the user is able to provide the affiliate From Lines to be used for the email campaign.
Subject Lines: In this field the user is able to provide the affiliate the Subject Lines to be used in the subject of the email campaign.
Affiliate > Affiliate Portal

The Affiliate subtab contains additional information relevant to the affiliates who have an Active Campaign with this offer. Affiliates will see this information in their Affiliate portal regarding the offer.
Preview Link: The Preview Link is intended to be a direct link to the landing page. This gives an affiliate the opportunity to preview the offer.
Offer Description: If the user has a specific description of the offer they would like to provide affiliates you can determine that information here. Affiliates will be able to see the text or html from their Affiliate portal in the Offer card.
Restrictions: If the user has specific restrictions for this offer they can be defined here and affiliates will be able to see the text or html from their Affiliate portal in their Offer card.
Advertiser Extended Terms: If the advertiser has specific extended terms that an affiliate must agree to they can be defined in this text box. Affiliates will see the text or html when clicking on a Public or Apply To Run Offer. The affiliate is required to click the "I agree to the Terms & Conditions" checkbox before accessing the offer.
Testing Instructions: If there are specific testing instructions for this offer they can be defined here. Affiliates will be able to see the text or html from the Test Offer page. This is intended to provide affiliates with unique testing information when verifying the tracking of their conversion pixel.
Offer card in Affiliate Portal


The above screenshot displays the Offer card in the Affiliate Portal. The editable information (such as description and restrictions) on the Affiliate tab in the admin Offer card is displayed here in the Affiliate Portal Offer card.
The information you edit on the Affiliate tab > Email button in the admin portal is also displayed on the Offer card in the Affiliate Portal from the Email tab as the above screenshot displays.
Offer card > Advanced

The Advanced tab on the Offer card houses 4 subtabs:
Upsells
Prepops
Offer Tiers
Pixel Domains
Advanced > Upsells

Upsells are an optional offer that is displayed to a user if the user returns to the same offer within the click cookie days set for the offer after a conversion has occurred.
On the Upsell tab you can click Add Upsell to add your Upsell offers.
For a comprehensive overview of setting up Upsells please see the Upsells document.
Advanced > Prepops
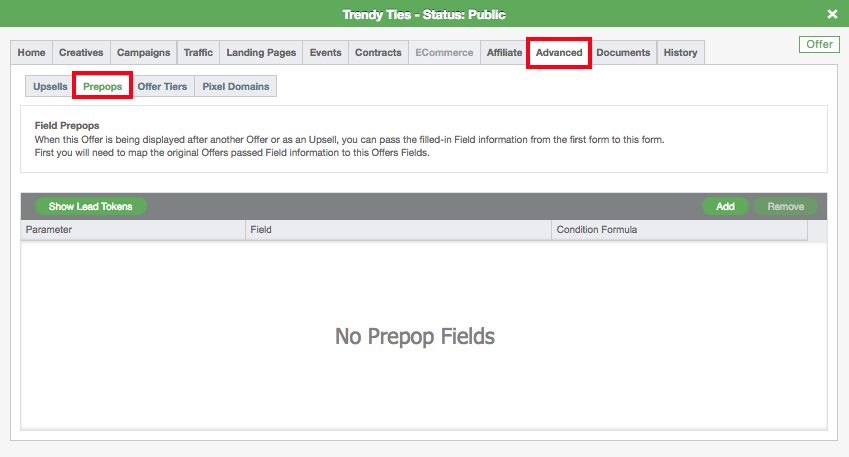
The Prepops tab on the Offer card allows you to pre-populate filled-in field information from the first form to the second form if if this offer is being displayed as an Upsell.
For a comprehensive overview of how to setup Prepops please see the Prepops document.
Offer card > Documents

The Documents tab allows you to upload a variety of different documents to the Offer card.
Click the Upload Documents button and select the type of document you are looking to upload.
Offer card > History
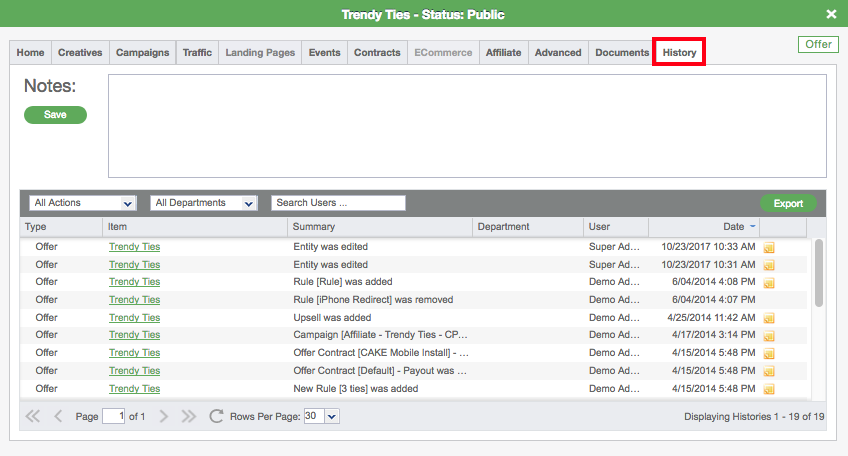
The History tab contains an audit trail of activity pertaining to this Offer. Similar to all History tabs, this section also allows for notes to be saved which are searchable.
The History tab will display a summary of the action that took place, who made the edit/change and when the edit/change was made with a date/time stamp.